Heating and cooling our homes account for more than 50% of our energy cost. We cringe when we see that heating bill in the cold winter months, when we know that our system has ran almost continuously. In the winter, we take special effort to ensure that every window sill and door threshold is sealed up tightly. We insulate our attics to capacity, going over every weatherization technique known to man. We want every last bit of warm air to stay in our home. The last thing you want to happen is to let that precious heat escape.
With this in mind, think about the duct work supplying your home. Do you know that almost every duct system has leaks? Even a well installed duct system can begin to leak overtime at joints and seams.
A proper load calculation actually takes air loss into consideration. Air loss can be anywhere from around 5% up to 20% and more. Imagine what that could mean for unit efficiency. Units will begin to run longer, rooms may become different temperatures, and you may even notice more dust in your home than usual. This is where duct sealing comes into play. The goal here is to minimize the leakage.
The following is documented for your knowledge of how duct sealing actually works. If you have any questions regarding duct sealing, please feel free to contact us.
Most HVAC Ducts Are Not Properly Sealed
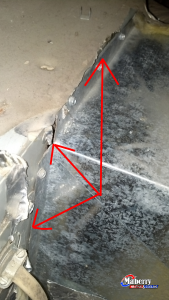
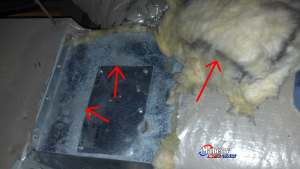
Figures 1 & 2 show a common HVAC duct system. This is an every day example of duct leakage. Though it may not look like a lot, the evidence shows. If you look closely, you may notice gaps where the duct that attaches to the unit. Though it has fasteners securing it, it’s not enough to stop the the high pressure air coming out.
The Supply Duct
As you can see, the duct work here has been patched (figure 2, center). The outline of the patch can be clearly seen on the yellow insulation that covers it. The dark outline is dirt from the air stream. The duct work shown here is the supply, which carries the conditioned air to the rooms in your home. The air flows out of the supply duct as positive pressure.
You might be thinking, “Why is there dirt in the conditioned air?”. There could be a couple reasons for this: one being that the filter is allowing contaminants through, the other would be holes and gaps in the return duct. As the blower inside the unit pulls a negative pressure through the duct, it allows contaminants to make their way into any holes left open.
The Return Duct
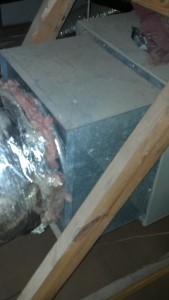
Figure 3 shows the return duct. It was left in the same condition as the supply. Unsealed, it was allowing all the dust and dirt from the attic space into the air stream.
Properly Sealed Ducts
Ducts can be sealed in a few different ways, two of which are used most often: UL approved mastic tape and liquid mastic paste. In this case, we used the UL approved tape in addition to some silicone caulking for the larger gaps. After a little surface cleaning, the tape sticks well. After passing a squeegee across the tape, it bonds securely. Every seam and hole in the duct must be sealed. Even the tiniest of holes allow contaminants into the air. Figures 4 & 5 show how the duct was sealed.
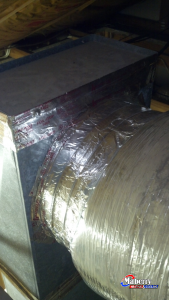
Return duct sealed with mastic tape.
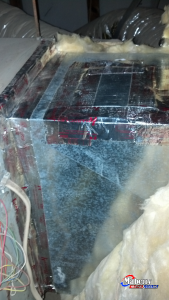
Properly Sealed Supply Duct
Though it takes some work, you will notice a difference. Some improvements could be:
- Decrease in Dust
- Decrease in Allergens
- Increased Airflow
- Decrease in Smells
- Increase in Equipment Efficiency
- Decrease in Energy Bills
- Cleaner Coils Increase Life Expectancy of Equipment
If you would like more information on duct sealing please let us know. We would be happy to take a look at your system and give you our recommendations.
